
Has your AC stopped producing cool air? If so, it may be time to check and recharge the freon.
The question is, how do you know? Also, how do you check the freon level and recharge the AC if needed?
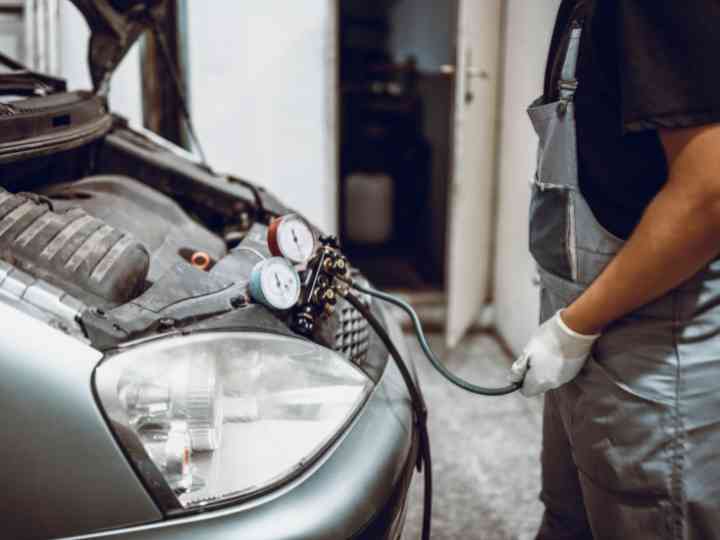
A car’s freon level can be checked by using a freon gauge, which should read between 25 and 45 psi under normal conditions. A freon reading lower than this range likely indicates that the freon needs to be recharged.
Here are the most common signs to watch out for that would indicate that your freon level is low.
Signs That Your Freon May Be Low
Several signs will let you know if your vehicle requires more freon. Some of the most common signs include:
1. The AC Isn’t as Cold as It Once Was
You may still feel some cold air coming from the vehicle’s vents, but freon may have leaked out of the unit if it isn’t as cold as it used to be.
2. The AC Doesn’t Produce Any Cold Air
If no cold air is produced, it’s a sign all the freon has leaked out of your vehicle. This could happen suddenly or occur over time.
3. You Cannot Hear the AC Clutch When the Unit Is Turned On
The clicking sound you hear when you turn your AC on means, it is working properly. If you no longer hear this, it may signify your unit is out of freon.
The clutch can’t engage if there is not enough freon in the unit. Recharging the freon will get the AC clutch to engage again.
4. Visible Freon Leakage Under the Hood
It may be a freon leak if you notice greasy liquid around the AC lines, compressor, or even inside your vehicle.
5. Visible Ice on AC Compressor
If all the freon is gone, water is left behind. With no freon present, the water will begin to freeze. You will first notice the water freezing is around or on the compressor.
How to Check Your Freon Level
If you notice any of the signs above, it’s time to check your freon level.
Use the step-by-step guide here to do this properly and safely.
Step 1: Open the Hood and Find the Low-Pressure Port
Your vehicle’s AC compressor only compresses the gas. It cannot compress liquids, so you need to ensure only freon enters the compressor.
You can find the low-pressure service port between the evaporator and compressor. On the bigger AC line, the low-pressure service port includes a smaller valve than the high-pressure port, located on the smaller AC line.
You may notice an “L” on the low-pressure service port (note this isn’t true for all vehicles).
Step 2: Turn on Your Vehicle and AC
Turn the key to start up the engine. Turn the fans to the highest air setting and turn on the AC. If there is a Max-AC or recirculation feature, turn these on, too.
Step 3: Run a Low-Pressure Service Port AC Diagnostic
Keep the vehicle running and attach the coupler included with your recharge kit to the low-pressure service port. Just take the cap off and push the coupler until it connects to the port.
Be sure the freon can is not connected when testing the levels!
Once pressure is engaged, you can take the reading. It will tell you the amount of freon in your vehicle’s AC unit.
If the reading on the gauge is in the red zone, there is too much freon in the system. This requires a different service and usually a mechanic to handle the situation.
If your initial diagnosis was correct (that your vehicle has low freon), the gauge will show that the system has no or low freon. Now you can begin the recharge process.
How to Recharge Your Car’s AC
Once you are sure that low freon is the issue, it’s time to recharge the system.
The first step is to set up for adding freon. This means disconnecting the coupler from the low-pressure service port.
Shake your R-134A freon can for a few seconds and then connect it to your gauge.
You can then reattach the coupler to the port.
Make sure to keep the port in an upright position and never point the can upside down.
This may cause liquid freon to get into your system. You need to ensure the freon remains in a gas state.
Squeeze the trigger to release the freon while the can is in an upright position.
You can keep shaking the can while it is upright.
After shaking the can, rotate your wrist 90 degrees and move the can to an upright to sideways position several times.
Just make sure the can is never pointed downward.
After approximately 10 seconds, take pressure off the trigger and check the gauge. You should see the needle moving from the “Low” zone and into the green zone.
Continue the steps above, just make sure the freon level doesn’t reach the red zone on the gauge.
Excess freon can cause serious damage to the AC compressor.
Why Freon Needs to be Replaced
It’s important to note that it is normal for freon to leak from your car’s AC. Eventually, so much will leak out of the system that the AC won’t work as well as it once did.
In some cases, it will stop working entirely.
The good news is, if freon is the issue, it’s a pretty easy fix, as illustrated by the guide above.
However, if you aren’t confident that you can handle the problem yourself, take your vehicle to a mechanic.
They will be able to evaluate the problem and recharge the freon for you.
Keep in mind that you can do this yourself and likely save quite a bit of money.
For many, this is the preferable option if the only issue with the AC is low or no freon.